

Setting up a new region
Before your first click, the right panel asks two things: what this is called, and what you want measured. Getting both right up front saves reworking a group later.
Three kinds of takeoff
Section titled “Three kinds of takeoff”Tabs across the top of the panel choose what you are about to measure.
| Tab | Measures | Named with |
|---|---|---|
 Area Area | Areas, and perimeter or volume derived from them | Region Name |
 Linear Linear | Lengths, and band areas derived from them | Line Name |
 Count Count | Items | Marker Name |
All three share the same two basics. The name starts empty and you type it, and a colour is already chosen which you can change by clicking the swatch beside the name.
Name and colour together define a group, and groups carry the totals you price from. Take off the same material under two names and you get two totals, which is easy to half-price by accident.
Each tab also has a  gear button opening
Measurement Settings for that kind of takeoff, and the settings differ per
kind.
gear button opening
Measurement Settings for that kind of takeoff, and the settings differ per
kind.
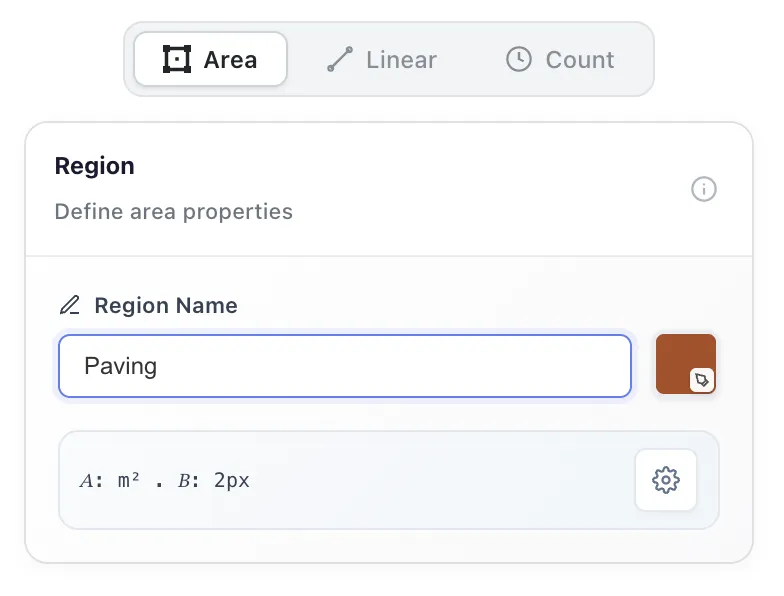
Titled Region, for defining area properties.
The summary strip under the name shows what this group will record, for example
𝐴: m² · 𝐵: 2px. It is the quickest way to confirm a group is set up the way
you meant before you start clicking.
Area measurement settings
Section titled “Area measurement settings”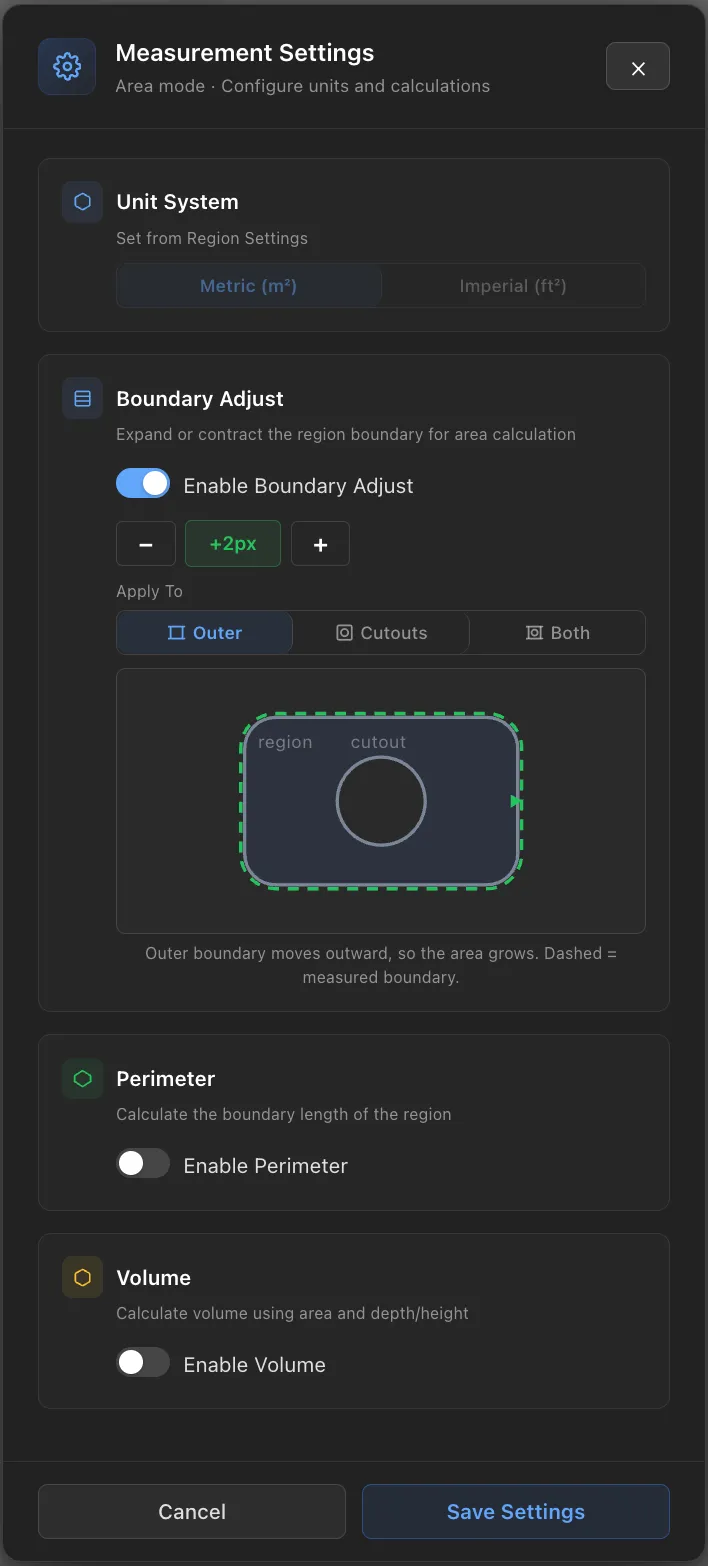
Area is always measured. Perimeter and volume are opt in and off by default. Boundary Adjust is on by default, covered below. Confirm with Save Settings.
Unit System. Metric (m²) or Imperial (ft²), taken from your Region Settings. It governs display only, never what was measured.
Boundary Adjust. Expands or contracts the measured boundary, set in steps
with the - and + controls.
Apply To chooses which edges move:
| Setting | Affects |
|---|---|
| Outer | The outer boundary only. The default. |
| Cutouts | The edges of holes only |
| Both | Both at once |
The dialog draws what your choice does and states the effect in words, for example that moving the outer boundary outward makes the area grow. Read that line before saving, since it tells you which way the quantity will move.
Use it when fills consistently land a little inside or outside a boundary across a whole drawing. It is a systematic correction, not a substitute for tuning Color Tolerance on one stubborn area.
Perimeter. Calculates the boundary length of the region. Turn on Enable Perimeter for edging, kerbs, skirting or mowing strips. It is reported in three parts:
| Shown as | What it measures |
|---|---|
| Pₑ | External perimeter, the outer edge only |
| Pᵥ | Void perimeter, the edges of holes only |
| Pₙ | Net perimeter, the outer edge plus the holes |
Picture a lawn with two planting beds cut into it. Pₑ is the edging around the outside, Pᵥ is the edging around the two beds, and Pₙ is everything you would actually order.
Volume. Calculates volume from area and depth. Turn on Enable Volume and give a depth: a 120 m² area at 150 mm gives 18 m³. Set it on the group rather than per region, and every region in the group follows.
Linear
Section titled “Linear”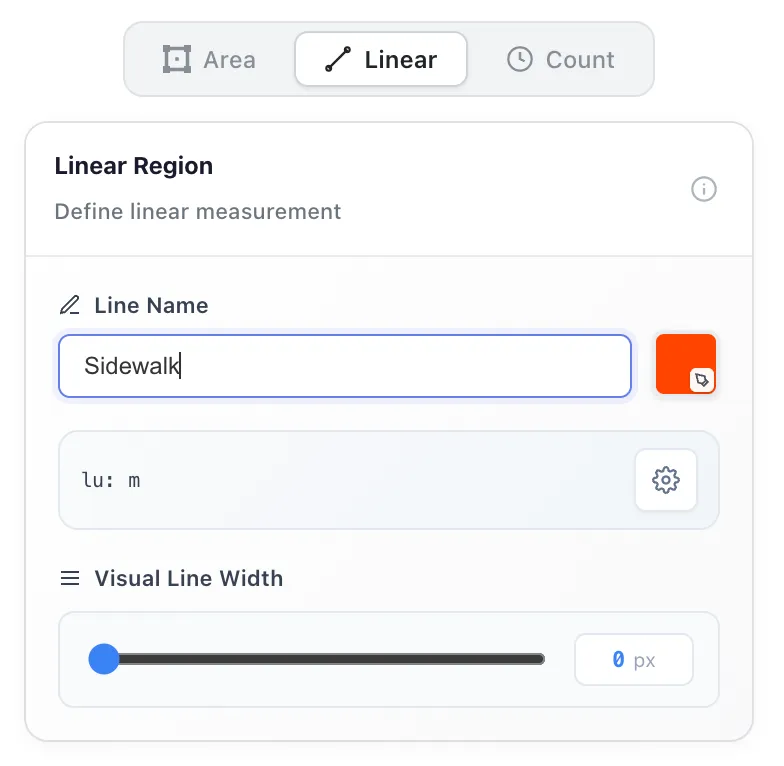
Titled Linear Region, for defining a linear measurement. The summary strip
reads lu: m, meaning linear units in metres.
Visual Line Width is a slider controlling how thick the line is drawn on screen, in pixels. It is presentation only. A wider line is easier to see on a busy drawing and changes nothing about the measurement.
Linear measurement settings
Section titled “Linear measurement settings”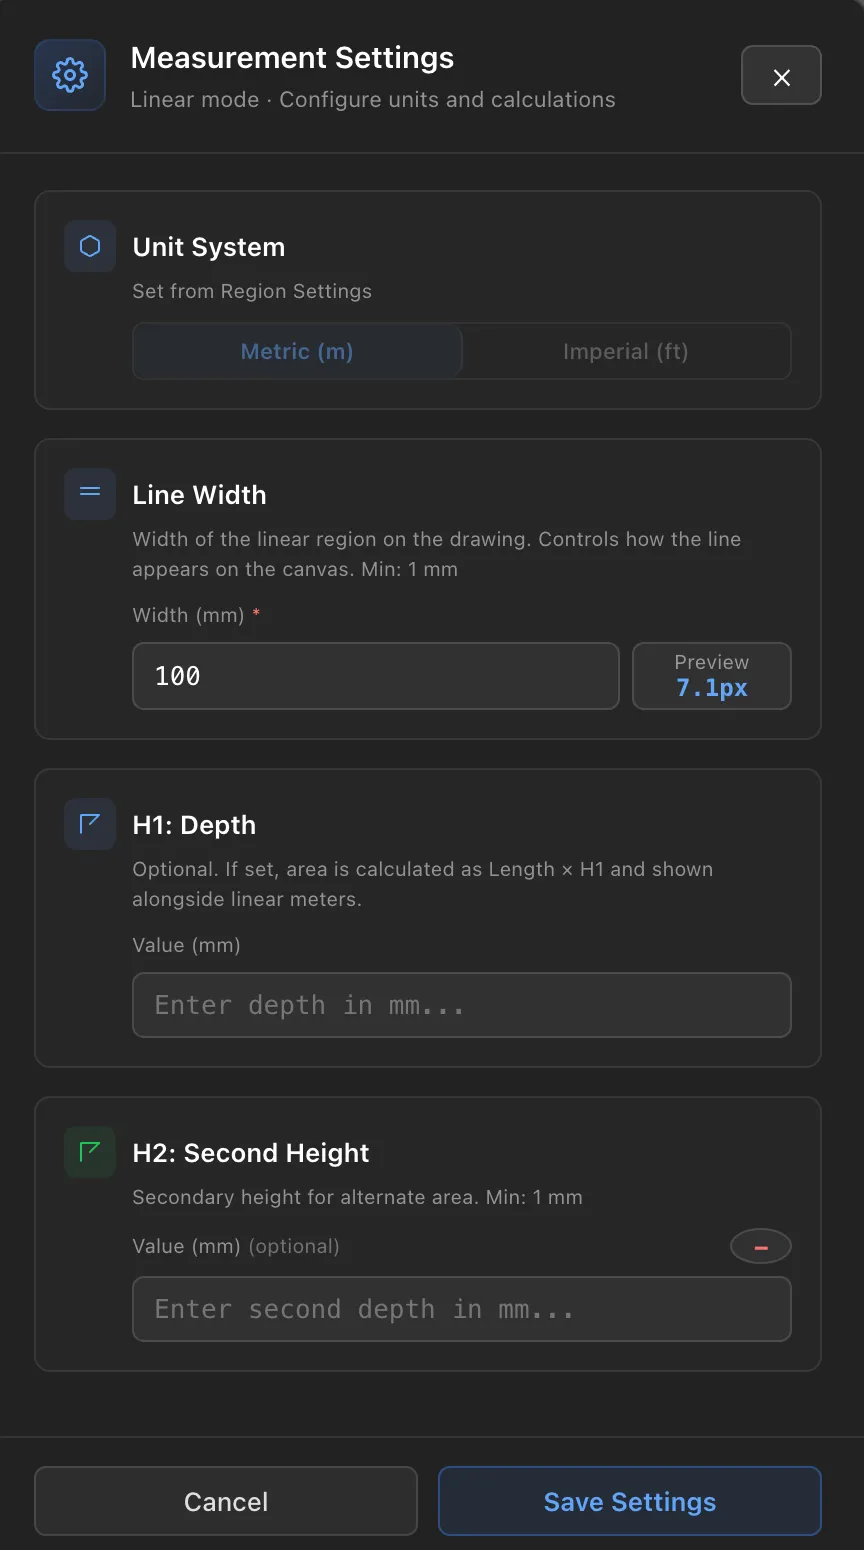
Unit System. Metric (m) or Imperial (ft).
Line Width. The width of the linear region on the drawing, in millimetres, with a minimum of 1 mm. A preview shows how many pixels that comes to at the current scale, so you can see whether it will read clearly.
H1: Depth. Optional. If set, an area is calculated as length × H1 and shown alongside the linear metres. This is where the A₁ figure comes from.
Use it when a run drives an area as well as a length, for example edging that is priced by the metre but also needs a face area.
H2: Second Height. Optional second height for an alternate area, giving A₂. Use it when one measured run drives two priced quantities, for example a kerb needing both a face area and a bedding area from the same length.
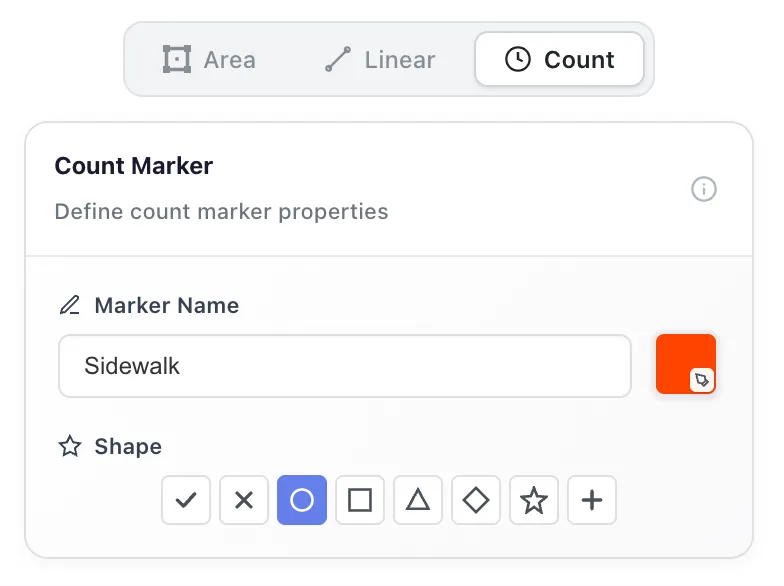
Titled Count Marker, for defining count marker properties.
Shape picks the marker: tick, cross, circle, box, triangle, diamond, star or plus. Circle is the default.
Use shape deliberately. On a drawing carrying several count groups, giving each a distinct shape as well as a distinct colour keeps them apart when the sheet is printed in black and white, which colour alone cannot do.
The defaults
Section titled “The defaults”| Setting | Default |
|---|---|
| Tab | Area |
| Name | Empty, you type it |
| Colour | Pre-selected, changeable |
| Marker shape | Circle |
| Perimeter | Off |
| Pₑ, Pᵥ, Pₙ display | All on, once perimeter is enabled |
| Volume | Off |
| H1 and H2 | Unset |
| Boundary Adjust | On, +2px, applying to Outer |
| Unit System | From Region Settings, metric unless changed |
Getting the order right
Section titled “Getting the order right”- Pick the tab: Area, Linear or Count.
- Type the name and set the colour.
- Open the gear and turn on what this group needs.
- Then start clicking.
That order matters, because these settings apply to work done after setting them. Taking off thirty regions and then enabling volume does not retrospectively give the earlier ones a depth.
If you do get it the wrong way round, Edit Group on a saved layer changes settings for the whole group at once, so it is recoverable, just slower than deciding first.
Groups, work in progress and saved layers
If you see Set the drawing scale first, that is the app declining to measure without a scale.