

Tour of the editor
The editor has five areas. Once you can name them, the rest of this documentation is much easier to follow.
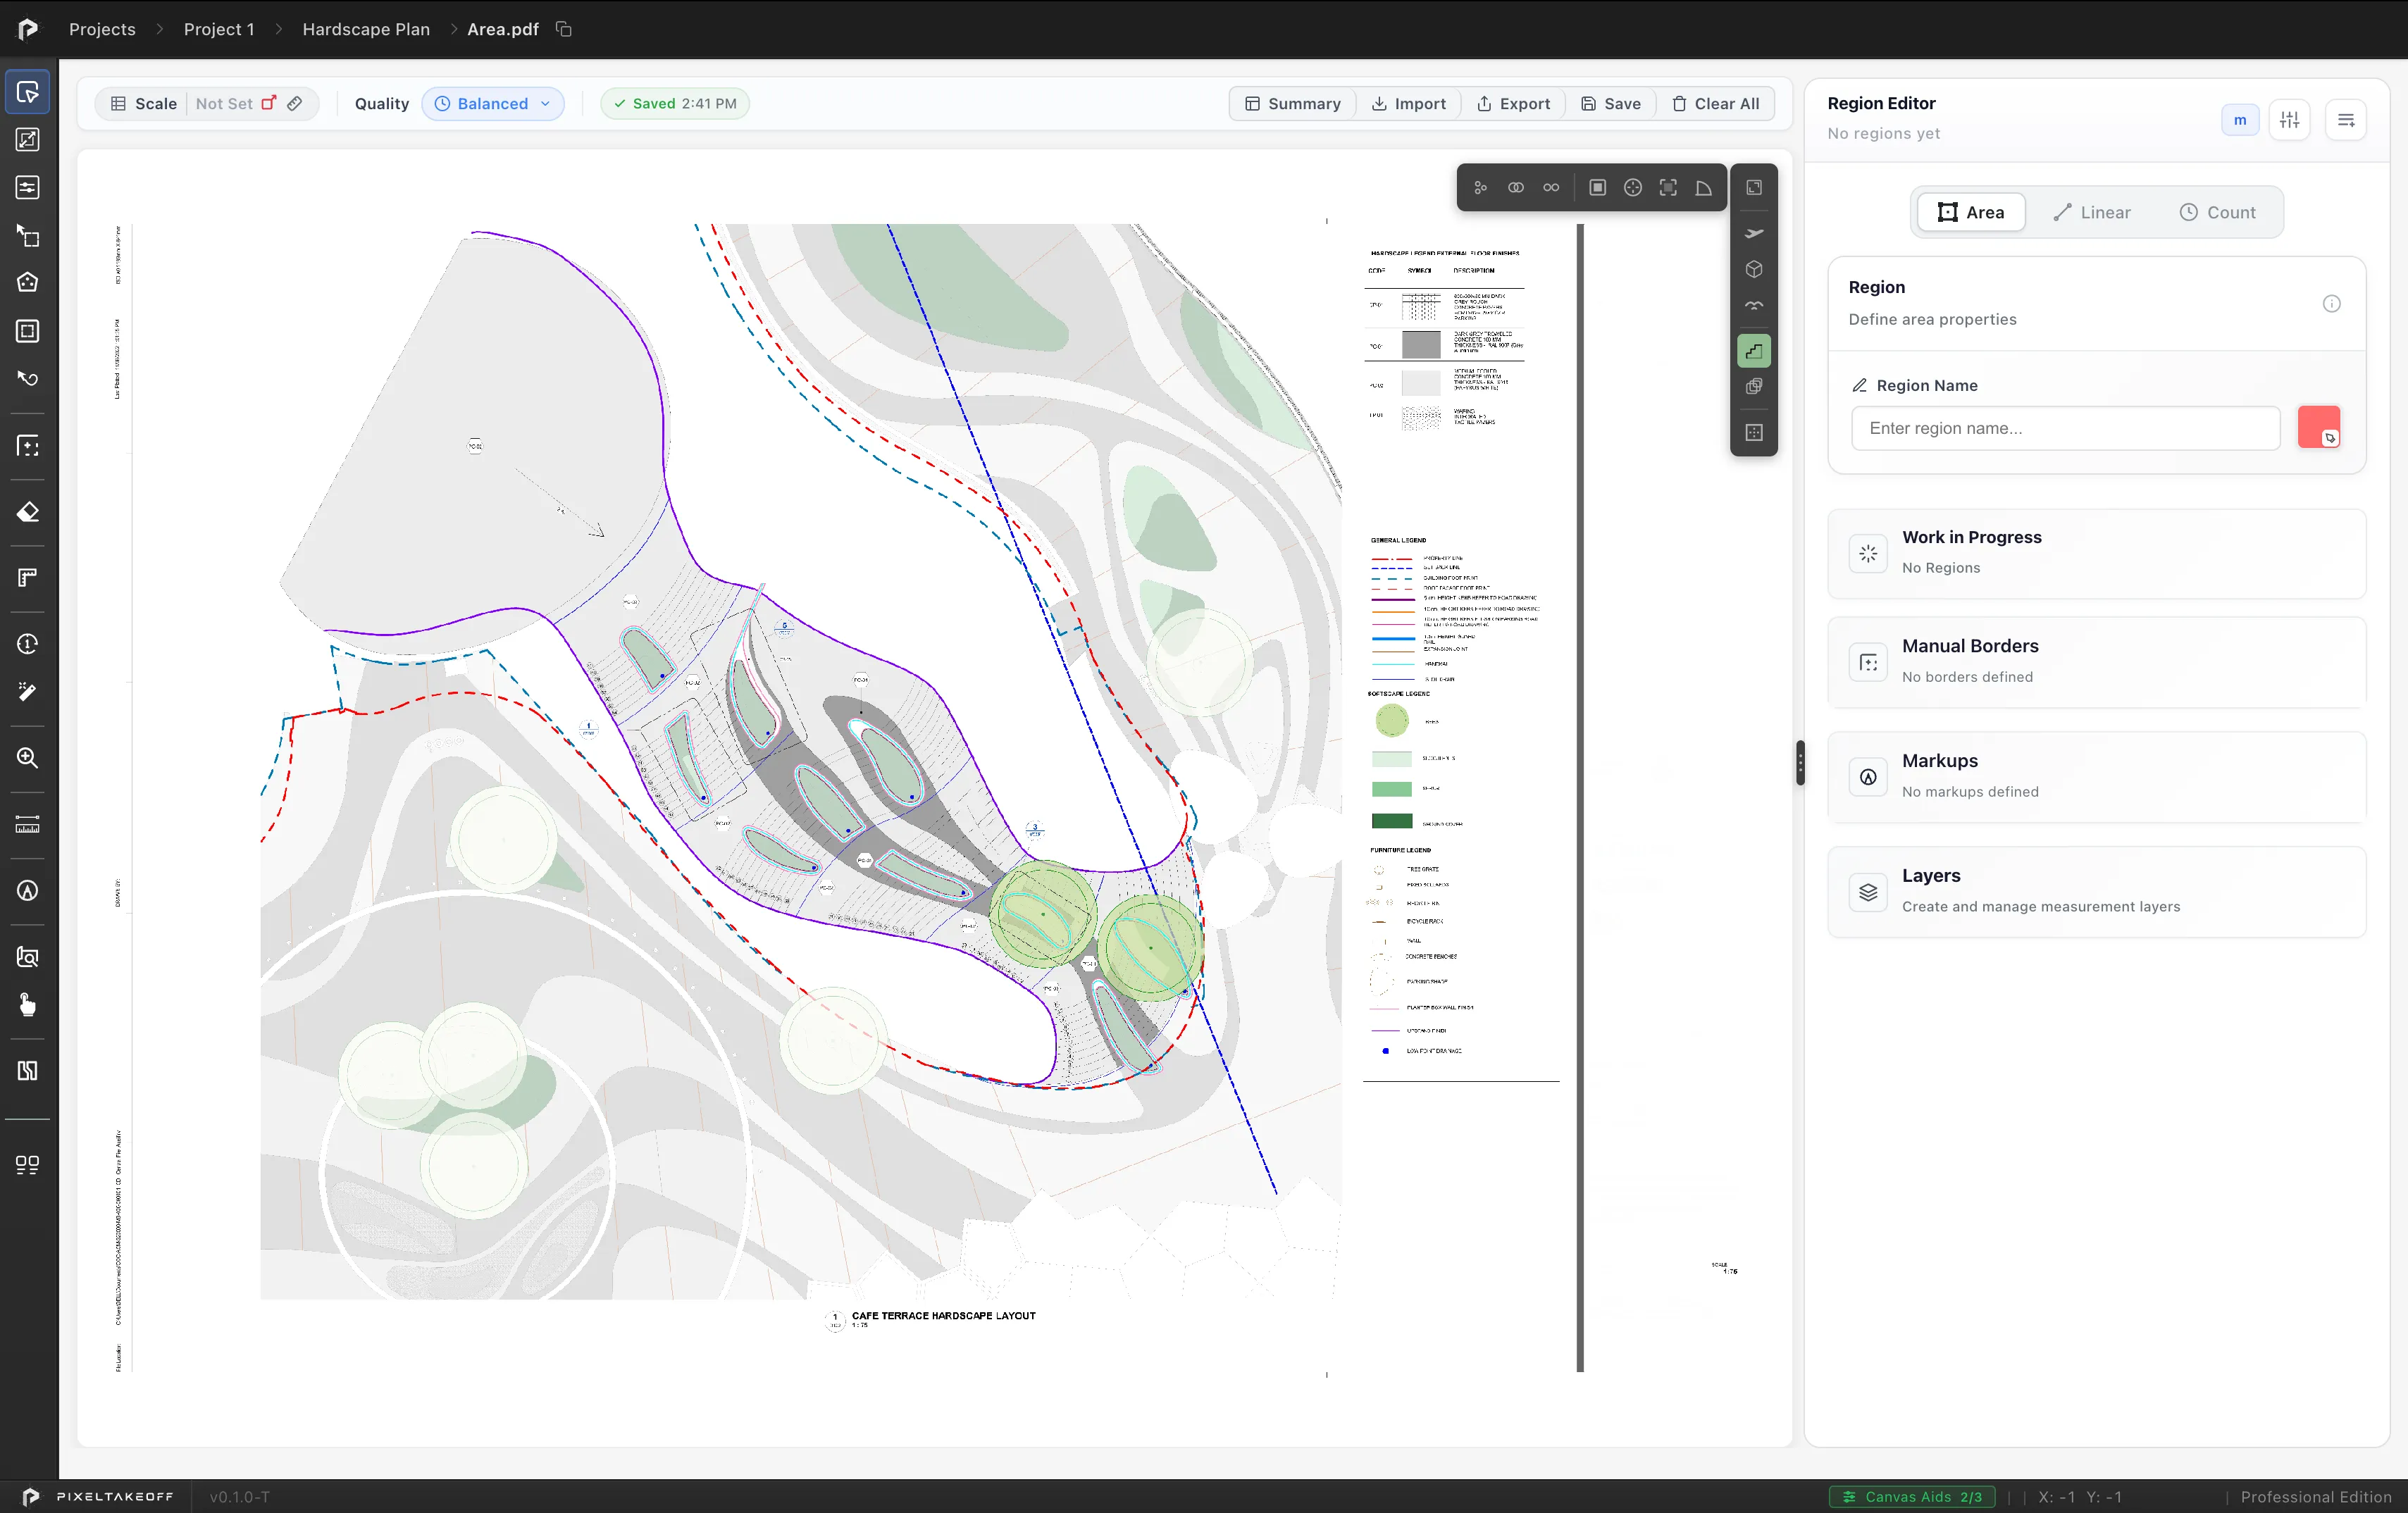
| Area | Where | What it is for |
|---|---|---|
| Top bar | Above the drawing | Scale, quality, and the Summary, Import, Export, Save and Clear All actions |
| Toolbar | Left edge | Choosing a tool |
| Canvas | Centre | The drawing, and where you take off |
| Canvas view controls | Over the canvas | How the drawing is displayed, and fill options |
| Right panel | Right side | The new region form, work in progress, borders, markups, zones and saved layers |
The top bar
Section titled “The top bar”The bar across the top of the drawing splits in two. On the left are the two settings that belong to this drawing, Scale and Quality. On the right are the actions: Summary, Import, Export, Save and Clear All.

The Scale chip shows the drawing’s scale, 1:100 for example, or Not
Set until you give it one. Two buttons sit beside the value:
| Button | What it does | |
|---|---|---|
 | Set Scale | Opens the Drawing scale dialog, where you pick a known scale |
 | Calibrate Scale | Measures a known dimension on the drawing and works the scale out from it |
Scale is per drawing, not per project, so each new sheet needs its own. Nothing can be measured until it is set, which is why the tour points at it first.
Quality
Section titled “Quality”Quality controls how much detail the drawing is displayed with. Click the chip to change it:
| Setting | Best for | |
|---|---|---|
 | Optimal | Fast processing. Large or simple sheets where you are not clicking small targets |
 | Balanced | The default, and the right answer for most drawings |
 | High | Maximum precision. Dense sheets, fine hatching, small text |
Quality changes what you can see and how accurately you can click. It does not change your quantities, which come from the scale.
Settings holds the default that every new drawing opens at, and the chip here overrides it for the drawing you are working on.
Once a drawing has been saved, a green Saved chip appears with the time. The editor also saves on its own about once a minute whenever there is something new to save, so that time keeps moving without you touching anything.
Actions
Section titled “Actions”| Action | What it does | |
|---|---|---|
 | Summary | Opens the takeoff summary, every group and its total. Reads Edit Summary once the table is pinned to the drawing |
 | Import | Opens the Import dialog for a .ptw workspace or workbundle file. Drag the file onto the dialog or use Browse Files |
 | Export | Opens the Export dialog, with a tab for the current drawing and a tab for the drawing set |
 | Save | Saves now rather than waiting for the next automatic save. Reads Saving… while it runs |
 | Clear All | Empties the canvas. Asks before it does anything |
Summary and exportUndo and redo
The toolbar
Section titled “The toolbar”The left edge is divided into sections, top to bottom, with dividers between them. Every tool has a single-key shortcut, shown in brackets below and in the tooltip when you hover. The icons are the ones on your screen, so you can match this page to the toolbar directly.
Area tools
Section titled “Area tools”The first section is the eight area tools:
| Tool | Key | What it is for | |
|---|---|---|---|
 | Region | R | Click once inside an enclosed area and it fills to the boundary and measures it. At its best on a plain area of solid colour with a clean edge around it |
 | Expand Region | X | Grows a fill outward, click by click. Reaches past the light linework inside a hatch and stops at the solid edge around it, so a hatched or textured area comes out whole instead of in strips |
 | Precision Region | P | For areas that will not come out cleanly because the drawing puts several materials in near identical tones. Slower per area, but you decide what is in and what is out |
 | Shape | S | You draw the area, as a box, circle, ellipse, polygon or brush stroke. The answer when the drawing has no boundary to find, or when you are pricing an allowance |
 | Color Sweep | D | Takes off every area sharing one colour in a single action. Made for drawings that use a consistent fill colour per material, where clicking them one by one would take all morning |
 | Inclusive Region | I | You pick which colours count as part of the area, then one click takes off everything made of them. For areas drawn in several colours at once. Keep the boundary colour off the list or the fill runs straight through it |
 | Free Trace | F | Draw the boundary by hand. The fallback for a shape nothing automatic can follow, and for scans too soft to read reliably |
 | Color Filter | Q | Draw a polygon, then keep only the colours you choose inside it. For areas where the material shares its space with linework, text or other colours |
Manual Border
Section titled “Manual Border” Manual Border (
B) closes gaps in a boundary so a
fill stays contained.
Eraser
Section titled “Eraser” The Eraser (
E) expands when selected into its
twelve modes, in two families either side of the divider: the seven shape
modes above it, and the five region modes below.
Shape modes, for erasing inside a shape you draw:
| Mode | Key | What it does | |
|---|---|---|---|
 | Polygon | 1 | Erases an irregular area, clicked corner by corner |
 | Drag Box | 2 | Erases a rectangular strip or block, sized by dragging |
 | Box | 3 | Erases a fixed square, good for repeated removals of one size |
 | Drag Circle | 4 | Erases a circle you size by dragging |
 | Circle | 5 | Erases a fixed circle, good for repeated small removals |
 | Brush | 6 | Paints away freehand, for fiddly edges |
 | Ellipse | 7 | Erases an elliptical opening |
Region modes, for erasing a detected area without tracing it:
| Mode | Key | What it does | |
|---|---|---|---|
 | Region | ⇧R | Removes a whole detected area in one click |
 | Sweep | ⇧S | Removes along a swept path |
 | Multi | ⇧M | Removes several detected areas in one action |
 | Expand | ⇧X | Removes an area and grows outward from it |
 | Free Trace | ⇧F | Traces the outline of what to remove |
Linear Region
Section titled “Linear Region” Linear Region (
L) expands when selected into
three subsections: the four drawing modes you drive yourself (Polyline,
Dashed Trace, Freehand Trace, Ellipse), the three automatic modes that
follow the drawing for you (Dot Trace, Auto Boundary, Auto Line), and the
Cut tool at the bottom for removing a section from a run.
| Mode | Key | Section | What it does | |
|---|---|---|---|---|
 | Polyline | 1 | Drawing modes | Straight runs with corners, clicked one corner at a time |
 | Dashed Trace | 2 | Drawing modes | Follows a line that is dashed or broken on the drawing |
 | Freehand Trace | 3 | Drawing modes | Draws the path yourself by dragging |
 | Ellipse | 4 | Drawing modes | Circular and elliptical runs |
 | Dot Trace | 5 | Automatic modes | Place points along a route and the line between them is followed for you |
 | Auto Boundary | 6 | Automatic modes | Follows the edge of an area automatically |
 | Auto Line | 7 | Automatic modes | Follows a drawn line automatically |
 | Cut | C | Cut | Removes a section from the middle of a run |
Counting
Section titled “Counting”| Tool | Key | What it does | |
|---|---|---|---|
 | Count | C | Places a numbered marker on each item you click |
 | Auto Count | A | Finds every instance of a symbol from one example |
Magnifier, Measure Width and Markup
Section titled “Magnifier, Measure Width and Markup”| Tool | Key | What it does | |
|---|---|---|---|
 | Magnifier | H | Magnifies the area under your cursor for precise clicking |
 | Measure Width | W | Checks a distance without recording anything |
 | Markup | M | Annotates the drawing: notes, clouds, callouts, highlights. Never measured |
Find Pattern and Inspect
Section titled “Find Pattern and Inspect”| Tool | Key | What it does | |
|---|---|---|---|
 | Find Pattern | G | Highlights every place a detail or arrangement appears |
 | Inspect | V | Selects without drawing, the safe tool while reviewing |
 Zone (
Z) scopes a takeoff to part of the sheet,
such as one phase.
Drawing navigator
Section titled “Drawing navigator”The last button,  Drawing Navigator (
N), opens the list of
drawings in the current set, so you can switch sheets without leaving the
editor. Search by name, and sort by Custom order, Date Added or
Modified, the same three orderings as the Projects page. Esc closes it.
Each entry carries the same takeoff badge as the Projects page cards, so you can
see which sheets already have work on them without opening them.
Each drawing
in the list can also be opened as a reference window, a second window
showing its finished takeoff sheet for side by side comparison.
Stepping through sheets. The arrows at the top right of the editor move to
the previous or next drawing, showing your position in the set as 3 / 12.
Hovering an arrow names the sheet it would open. They follow the navigator’s
sort, so sorting by Modified steps through in that order.
Alt + ← and Alt + → (Option on a Mac) do the same from the keyboard,
as do PageUp and PageDown.
The canvas
Section titled “The canvas”The drawing itself, and where all takeoff happens.
The sheet sits on the canvas as a page with a soft shadow around it, so the edge of the drawing is clear even on a plan with no printed border. Takeoff only happens on the page: clicking outside it tells you the click was not in the takeoff range rather than placing anything there.
- Pan: drag with the middle mouse button. This works whichever tool is selected, so you can move around without switching away from what you are doing. With the Left-click drag pan canvas aid turned on, dragging with the left button also pans when you are not mid drawing.
- Zoom: scroll wheel.
- Fit to Screen: returns the whole sheet to view when you have lost your bearings.
Middle button drag is the one worth building the habit around, since it never conflicts with the tool in your hand.
The Canvas Aids chip in the status bar along the bottom holds three helpers for working on the canvas: the always-on Magnifier, Left-click drag pan and the Full-screen crosshair.
Zoom in before clicking on anything tight. Accuracy of your clicks carries straight into the quantities.
Canvas view controls
Section titled “Canvas view controls”These sit over the canvas and change how the drawing is displayed or how fills behave. They do not change any quantity you have already measured.
Display
Section titled “Display”| Control | Key | What it does | |
|---|---|---|---|
 | Fit to Screen | Ctrl + 1 | Returns the whole sheet to view |
 | TakeOff View | Ctrl + 2 | Shows your takeoff over the drawing, the normal working view |
 | 3D View | Ctrl + 3 | Shows the takeoff as a three dimensional plan, using the depths you have set. Good for sanity checking volumes and showing a client |
 | Hawk View | Ctrl + 4 | Whites out everything already taken off, so what still needs measuring stands out. The quickest way to spot leftovers before you finish a sheet |
 | Crisp | Ctrl + 5 | Sharpens the drawing so fine lines and small text are easier to read. Useful on dense sheets and soft scans |
 | Hueprint | Ctrl + 6 | Re-presents the drawing so different elements are easier to tell apart and select. Most effective where materials are hard to distinguish by eye |
 | Boundary | Ctrl + B | Restricts a fill so it respects the boundary you are working within |
Batch Takeoff
Section titled “Batch Takeoff”Three buttons in the canvas controls take off many areas in one action instead of one click at a time. They need a region tool selected to be available, and each uses that tool’s settings for every fill.
| Mode | Key | What it does | |
|---|---|---|---|
 | Multi | J | One region per dot you place |
 | Merge | K | One combined region from all the dots |
 | Unmerge | U | A separate region for each piece the dots run across |
Fill options
Section titled “Fill options”These change how the next fill behaves. Set them before you click, not after.
| Option | Key | What it does | |
|---|---|---|---|
 | Solid Fill | ⇧S | Closes the area up to its perimeter, for areas defined by an outline rather than a solid fill |
 | Seal Gaps | ⇧G | Tidies an area whose outline has hairline breaks, without closing off openings that belong there. Use it when a fill comes out fragmented |
 | Bounding Box Fill | ⇧P | Fills the rectangle enclosing what you selected, for an area that should be measured as a rectangle even though it is drawn irregularly |
 | Door-aware Fill | ⇧D | Keeps a fill from escaping through door openings, for room by room takeoff on floor plans |
 | Color Lock | The first point you place sets the colour. Any later point sitting on a different colour is skipped, so one action does not pick up two materials |
The right panel
Section titled “The right panel”The panel runs top to bottom in the order you work: the new region form, then Work in Progress, then the Manual Borders, Markups and Zones sections, and finally Layers, your saved work.
The new region form
Section titled “The new region form”Above the form sits the  Layer Manager button, where you plan the
job’s quantity layers before you measure and share them across the drawing
set.
Layer Manager button, where you plan the
job’s quantity layers before you measure and share them across the drawing
set.
The tabs at the top,  Area,
Area,  Linear and
  Count,
choose what you are about to measure, with the name, the colour swatch and the
Count,
choose what you are about to measure, with the name, the colour swatch and the
 Measurement Settings gear beneath.
Work in progress
Section titled “Work in progress”New takeoff appears here first. Think of it as your working area: it is yours to adjust freely before you commit it. The heading counts what is in progress, and groups sit under a heading per kind: Area, Linear Regions and Count Markers. Each group shows its name, its colour, how many items it contains and its running total, and expands to show the individual items.
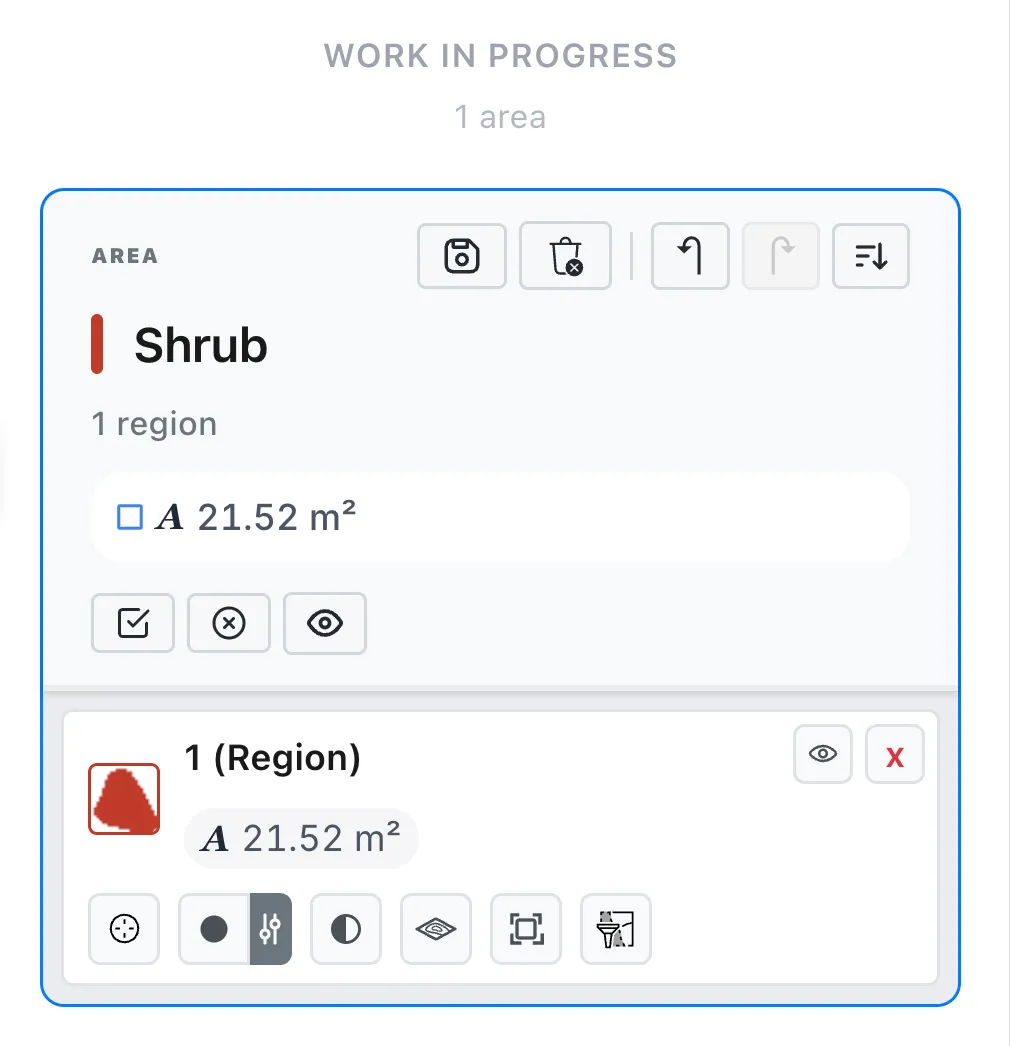
The group header carries the group actions, the same for all three kinds:
| Action | What it does | |
|---|---|---|
 | Save Group | Commits the group into saved layers |
 | Delete Group | Removes the group and its regions |
| ↶ | Undo | Steps back through operations on this group alone, so you can back out a bad erase on one material without disturbing anything else |
| ↷ | Redo | Steps forward again |
 | Sort regions | Changes the order regions are listed in |
 | Edit Settings | Opens the group’s measurement settings, depth, perimeter and the rest. For area and linear groups it appears once a region is selected; for count groups it is always available |
Below the total, three buttons manage the selection and visibility:
| Action | What it does | |
|---|---|---|
 | Select All | Selects every region in the group; click again to deselect |
 | Clear All | Clears the current selection |
 | Hide All | Takes the group out of view and out of the totals; click again to unhide |
With regions selected, the selection actions appear:
| Action | What it does | |
|---|---|---|
 | Combine Selected | Merges the selected regions into one, keeping the total |
 | Duplicate Selected | Copies the selected regions, for repeated identical items |
Each region row also has its own  show or hide
toggle, delete button, and a tick box for selections.
show or hide
toggle, delete button, and a tick box for selections.
When a group is right, save it. It moves down into saved layers.
Actions on a single region
Section titled “Actions on a single region”Every region row carries its own set of refinement actions, and they are where a good takeoff gets polished. For an area region:
| Action | What it does | |
|---|---|---|
| Seal Gaps | Refills the region with hairline breaks in its boundary sealed, so a fragmented fill comes back as one clean area |
 | Fill Holes | Fills the holes inside the region so they count in the area |
 | Extract Holes | The reverse: takes the holes back out of the region |
 | Preview Perimeter | Highlights the measured perimeter on the drawing, so you can see exactly what Pₙ, Pₑ and Pᵥ trace |
 | Boundary Adjust | Expands or contracts the measured edge, targeting the Boundary, the Cutouts or both |
 | Filter colors | Opens the Color Filter window on the region, dropping colours that should not have been included |
| 3D Volume Preview | Shows this region in three dimensions using its depth |
 | Uncombine | Splits a combined region back into its original parts |
A region drawn as a polygon also offers
 Reshape Polygon, dragging its
points to adjust the outline.
Reshape Polygon, dragging its
points to adjust the outline.
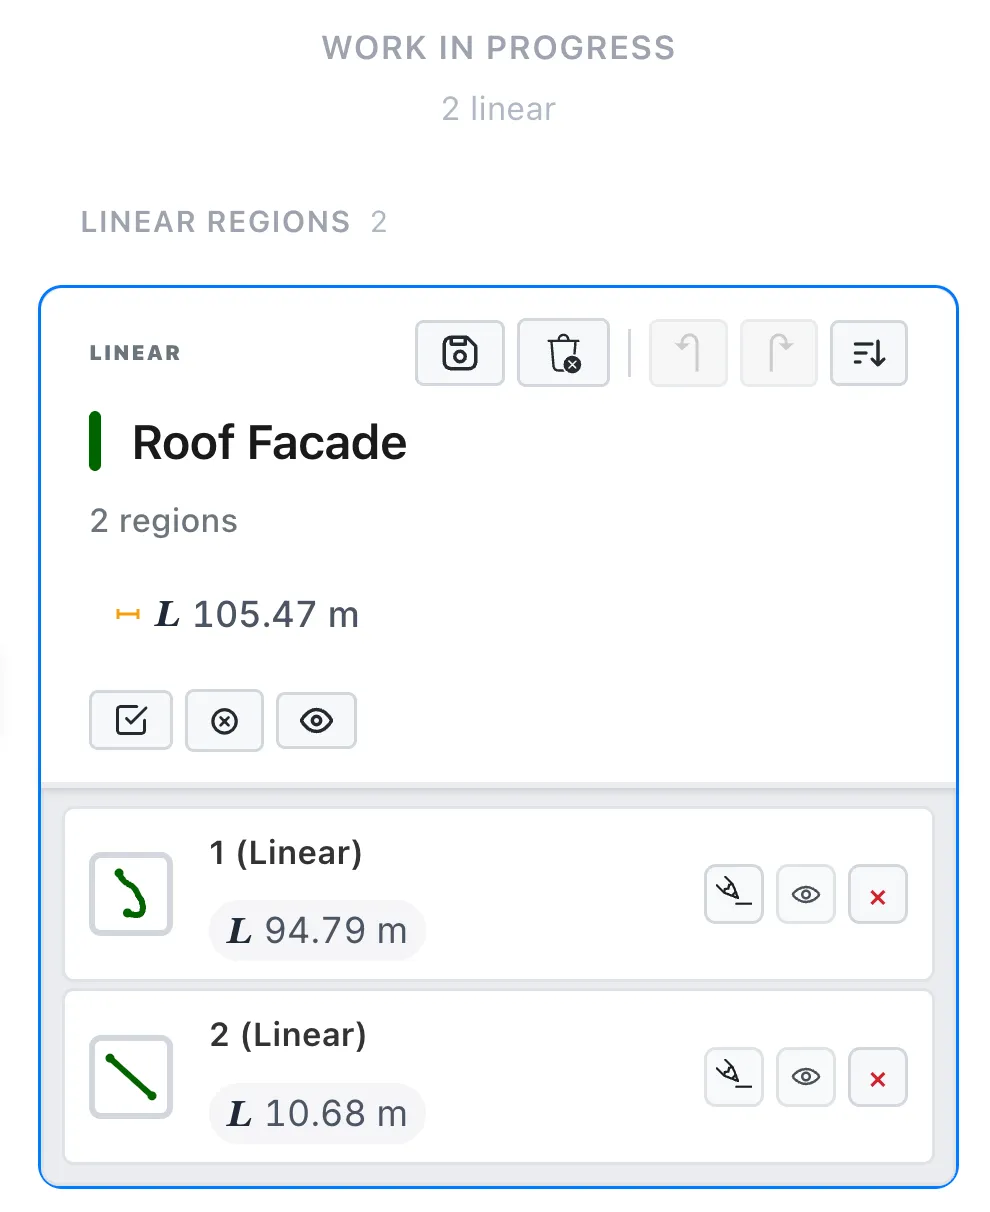
A linear region row shows a small picture of the run and its length, and
has  Edit Region,
which reopens the line so you can move points, add corners and adjust branches.
Edit Region,
which reopens the line so you can move points, add corners and adjust branches.
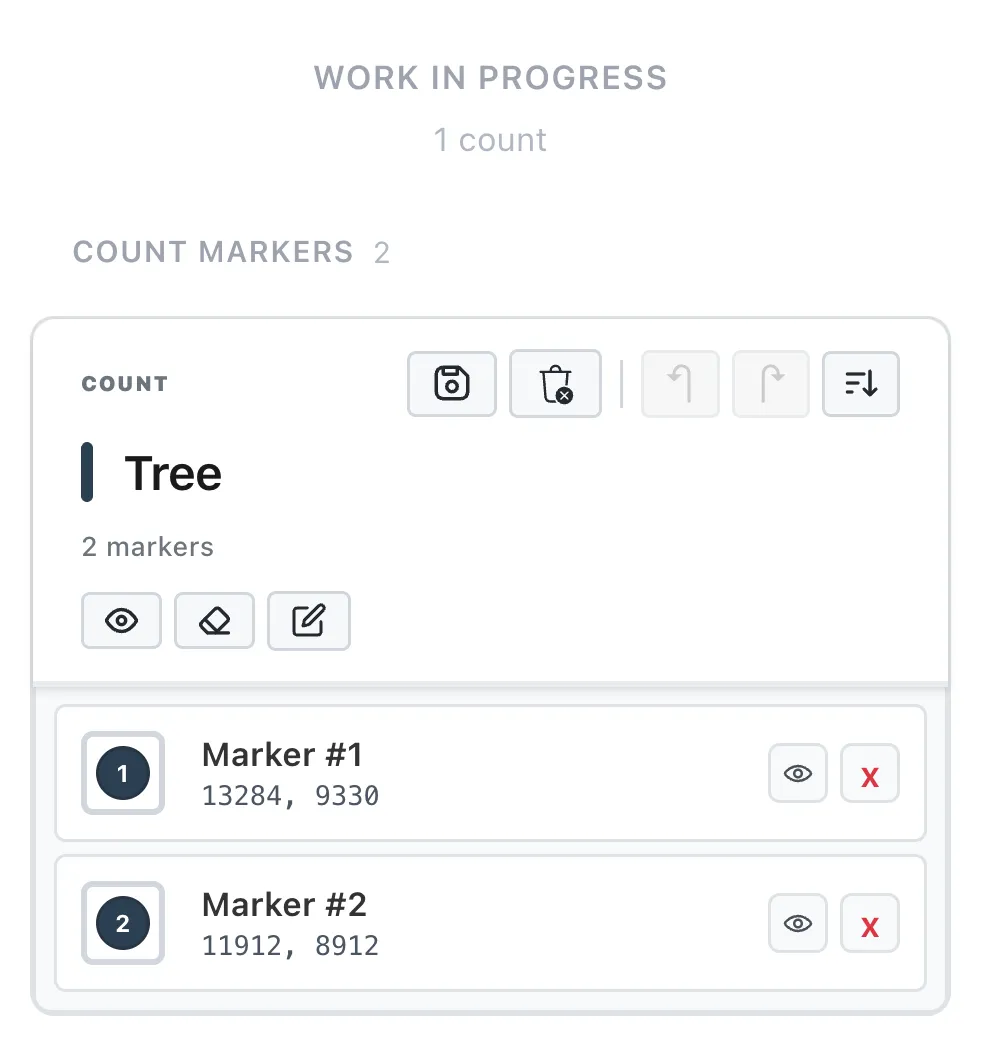
A count group lists its markers by number with their positions, each with its own show or hide and delete. The group’s buttons cover hiding all markers, erasing, and editing the marker settings.
These are re-runnable and safe to experiment with, and the group’s ↶ Undo steps back through anything you do here. A dedicated page walking through each of these in depth is on its way; until then the essentials are covered in the groups guide.
Groups, work in progress and saved layers
Manual Borders
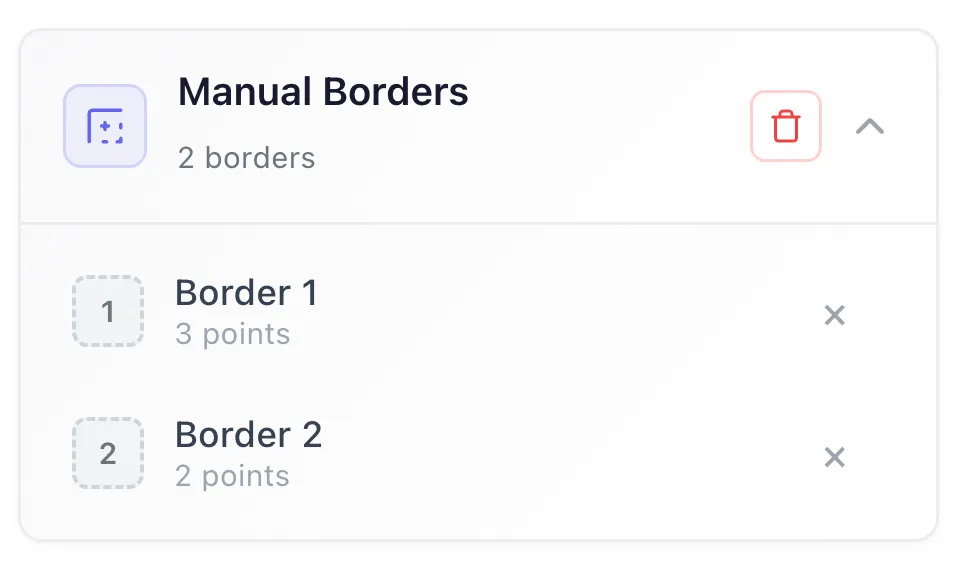
Section titled “Manual Borders”Every border you have drawn is listed with its number of points. Delete one with its ✕, or all of them with the trash button, once a drawing no longer needs them.
Markups
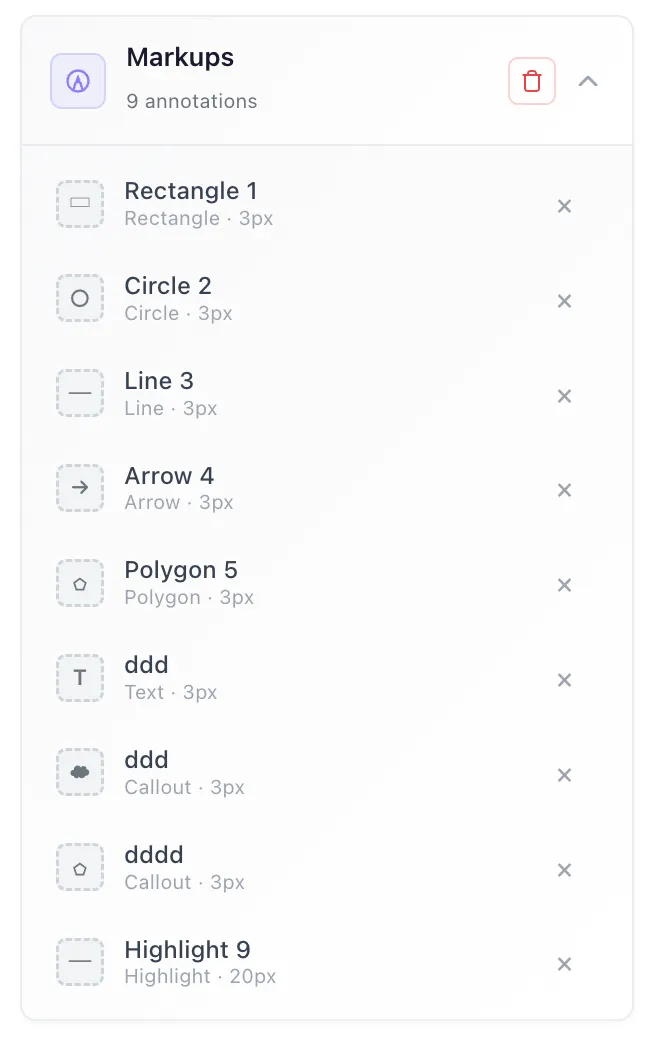
Section titled “Markups”Every annotation is listed with its name, its kind and its line thickness. Delete one with its ✕, or clear them all with the trash button.
Zones you have drawn get their own section, listing each zone so you can find it, open its quantities or remove it.
Layers
Section titled “Layers”Committed takeoff, protected from the eraser and the editing tools until Edit Group reopens it. Work in progress and saved layers both count in totals and exports; saving is about protecting finished work, not about inclusion.
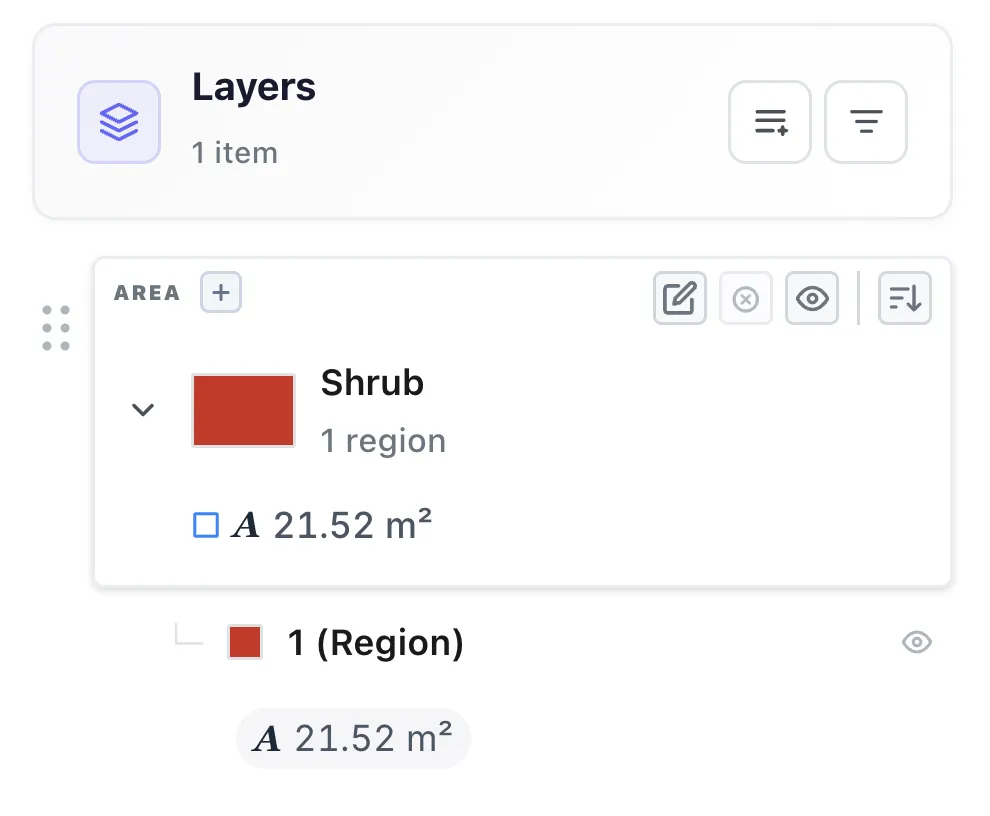
| Action | What it does | |
|---|---|---|
| Edit Group | Reopens a group to change its name, colour or settings |
| Hide | Takes a layer out of the view and out of the totals, a quick way to check one material on its own |
| Delete | Removes the layer. Use deliberately, this is committed work |
| Sort | Changes the order layers are listed in |
Drag to reorder changes the order layers are drawn and listed in, which matters when regions overlap visually and on the exported sheet.
Region Settings
Section titled “Region Settings”The  sliders button at the top of the right panel opens
Region Settings: Unit System, Region Opacity, Color Tolerance and Max
Pixels for this drawing. The same settings also exist globally in
Settings, as the defaults every new drawing starts from, and the values you
set here override them for the drawing you are working on.
sliders button at the top of the right panel opens
Region Settings: Unit System, Region Opacity, Color Tolerance and Max
Pixels for this drawing. The same settings also exist globally in
Settings, as the defaults every new drawing starts from, and the values you
set here override them for the drawing you are working on.
Region Settings: every setting, defaults, and global versus per-drawing
Status and progress
Section titled “Status and progress”Long operations show progress, and some can be cancelled while they run. If a drawing is large, the first open takes longest and later opens are quicker.